How to Use Lace Tint Mousse for a Flawless, Scalp-Like Wig Melt in 2026
Your lace should look like it’s growing directly from your scalp, not like a dusty film sitting on your forehead. We have all experienced the frustration of an ashy cast that makeup just can’t fix or a tint that rubs off the moment you step outside. It's discouraging when premium hair is undermined by a visible, unnatural lace line that refuses to blend.
You deserve a seamless, professional finish that stays vibrant and secure. Mastering how to use lace tint mousse is the ultimate shortcut to that high-end, undetectable melt. This aerated formula offers controlled, buildable pigment that respects the integrity of your lace while delivering a realistic skin match. It is the essential tool for anyone seeking a polished, scalp-like appearance without the mess of traditional foundation.
This guide provides the definitive steps to achieving a flawless transition. You will learn how to select the right shade for your unique undertones, apply the mousse with absolute precision, and secure a finish that looks like skin. Get ready to elevate your install with a result that is smooth, precise, and completely effortless.
Key Takeaways
- Learn why aerated mousse is the superior choice for a fast-drying, drip-free finish that protects the integrity of your lace.
- Understand the essential prep steps, including bleaching knots, that ensure your tint adheres flawlessly without blotching.
- Follow our professional guide on how to use lace tint mousse to create a buildable, realistic pigment match for your specific skin tone.
- Discover how to combine your tint with styling tools like Edge Control for a seamless transition and perfectly secured flyaways.
- Gain insights on maintaining your realistic scalp melt for up to two weeks with the right nighttime care routine.
What is Lace Tint Mousse and Why is it Better Than Spray?
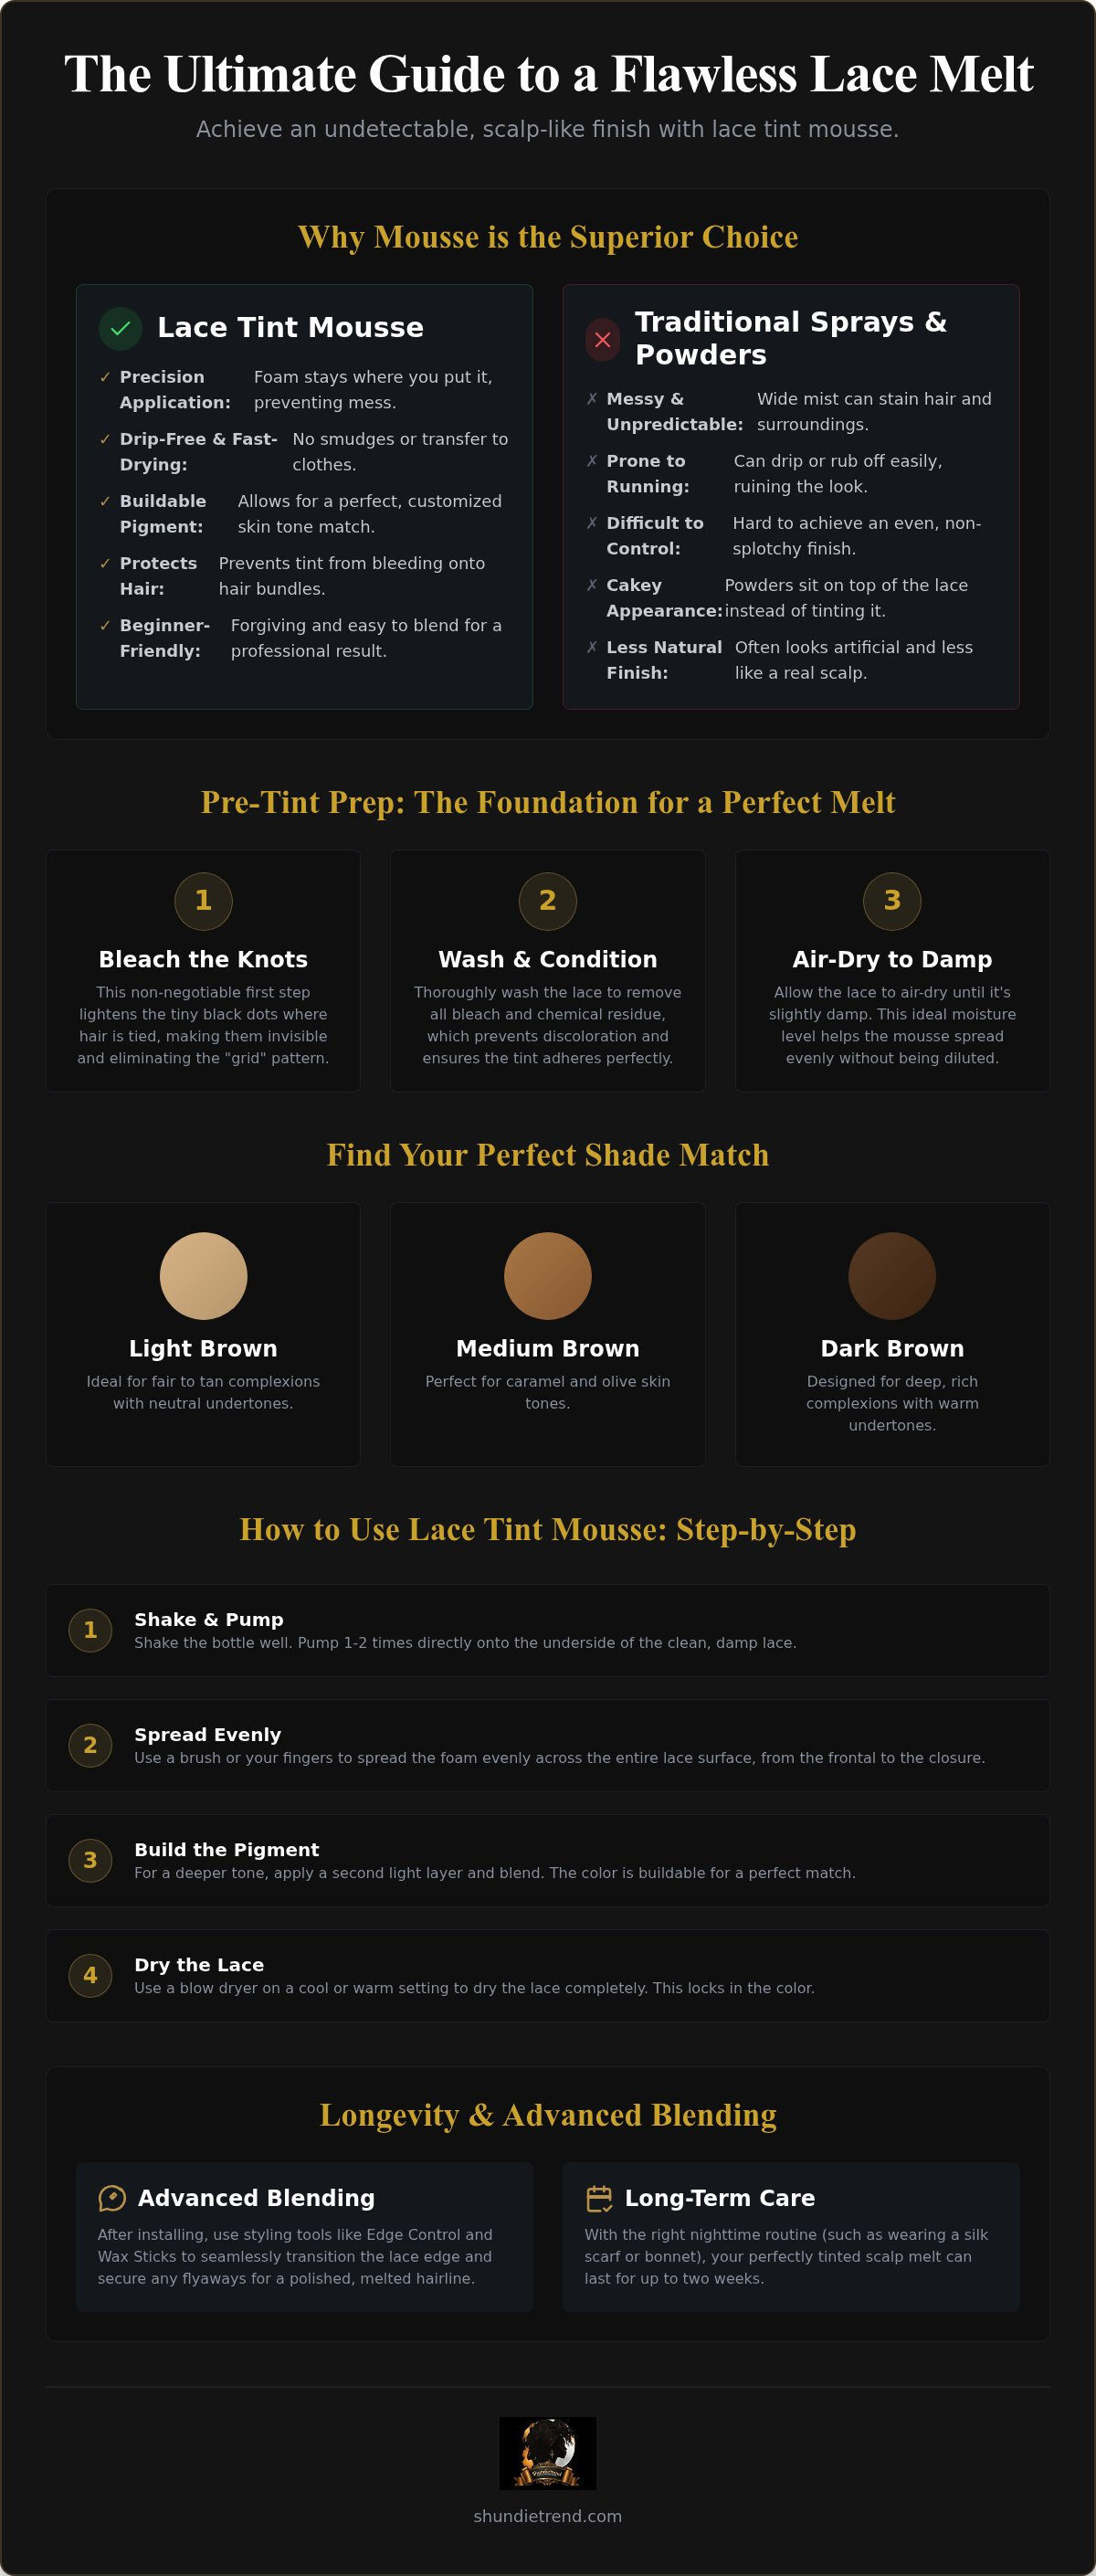
Lace tint mousse is the modern standard for achieving an undetectable wig install. It is a specialized, pigmented foam that bridges the gap between the lace material and your natural skin tone. This product is designed to eliminate the ashy, greyish cast that often plagues new wigs. By applying this airy formula, you create a seamless transition that mimics the appearance of a real scalp. Understanding how to use lace tint mousse is essential for anyone seeking the "invisible" HD lace look, providing a professional finish that makeup alone cannot replicate.
Traditional methods like makeup powders or liquid sprays often fall short. Powders are notorious for looking cakey; they sit on top of the lace rather than tinting the fibers. Sprays can be messy, unpredictable, and difficult to control. Mousse provides a distinct advantage. It is fast-drying, drip-free, and incredibly easy to blend. It doesn't rub off onto your clothes or forehead, ensuring your melt remains pristine and reliable all day long.
Mousse vs. Spray: The Precision Factor
Precision is the most significant benefit when you are learning how to use lace tint mousse. Unlike sprays, which release a wide, unpredictable mist, mousse stays exactly where you place it. This prevents the pigment from bleeding into the hair bundles, which can ruin the look of blonde or light-colored styles. The foam consistency allows you to spread the product evenly across the entire frontal or closure with a brush or your fingers. It is beginner-friendly, forgiving, and efficient. You achieve a high-end, professional result without the stress of staining the hair or creating splotchy patches on the lace. It’s about total control over your aesthetic.
The Role of Pigment in Scalp Realism
True realism depends on matching the subtle undertones of your skin. Shundietrend Lace Tint Mousse is formulated to tone the lace rather than just color it. Toning neutralizes the artificial brightness of the mesh, replacing it with a warm, scalp-like glow. The pigment is intentionally buildable. You can apply a single light layer for a sheer tint or add more pumps for a deeper, richer match. This flexibility ensures a perfect fit for every complexion. When paired with premium raw hair, this mousse creates a visual outcome that is smooth, precise, and completely natural. It is a sophisticated partner in your style journey, offering high standards and effortless integration.
Pre-Tint Prep: Setting the Stage for a Perfect Melt
Excellence starts with preparation. A flawless scalp illusion isn't just about the product; it's about the surface. Before you master how to use lace tint mousse, you must ensure your lace is a clean, ready canvas. High-quality 100% raw human hair bundles require a professional-grade starting point to truly shine. Proper prep prevents blotching and ensures the pigment settles into the fibers with absolute precision.
Bleaching the knots is the non-negotiable first step. These tiny black dots where the hair is tied to the lace create an artificial grid pattern. Bleaching lightens these knots, making them virtually invisible against the skin. If you skip this, the result is a "speckled" appearance that no amount of tint can hide. Think of bleaching as the structural foundation and tinting as the final aesthetic polish. Once bleached, wash the lace thoroughly. Residual chemicals can react with your mousse, causing unexpected discoloration or patchiness.
After washing, allow the lace to air-dry until it is only slightly damp. This specific moisture level helps the foam distribute evenly across the mesh without being diluted by excess water. Choosing the right shade is equally vital.
- Light Brown: Ideal for fair to tan complexions with neutral undertones.
- Medium Brown: Perfect for caramel and olive skin tones.
- Dark Brown: Designed for deep, rich complexions with warm undertones.
Bleaching Knots vs. Tinting Lace
Bleaching removes the "black dot" appearance by lifting the pigment from the hair knots. Tinting acts as a toner to match the lace material to your specific skin tone. They work in tandem to create realism. Always perform a deep wash after bleaching to remove all lightener. This prevents the mousse from oxidizing or changing color unexpectedly during application. A clean, residue-free lace ensures the tint stays put and doesn't run.
Testing Your Shade Match
Perform the "Forehead Test" before full application. Apply a small pump of Shundietrend Lace Tint Mousse to your forehead near the hairline. Check it in natural light to see how it blends with your undertones. If the pigment feels too intense for a specific "HD" lace, you can lightly dilute the foam with a drop of water on a mixing tray. Learning how to use lace tint mousse effectively means understanding these subtle adjustments for a buildable, natural finish.
Step-by-Step Guide: How to Apply Lace Tint Mousse
Once your lace is prepped and slightly damp, you are ready for the transformation. Achieving a professional finish requires a steady hand and a methodical approach. Mastering how to use lace tint mousse is about layering rather than flooding the material with product. This ensures the pigment settles into the mesh for a realistic, scalp-like appearance. This step-by-step process simplifies how to use lace tint mousse for consistent, high-end results.
- Expose the Lace: Turn your wig inside out. You must apply the foam to the underside of the lace, which is the side that will sit against your skin. This protects the hair fibers from staining.
- Dispense the Product: Apply 1-2 pumps of Shundietrend Lace Tint Mousse directly to the lace area. The aerated foam is lightweight and easy to manage, preventing the mess associated with liquid tints.
- Distribute Evenly: Use a small, firm brush or a makeup sponge to spread the foam. Work in circular motions. Ensure every inch of the lace, especially the hairline, is covered in a thin, even layer.
- Dry and Lock: Use a blow dryer on a cool setting or let the wig air-dry. This locks the pigment into the fibers for a smudge-proof finish.
- Layer for Depth: Evaluate the color. If the tint is too light, repeat the process. Building two or three thin layers is always better than applying one thick, heavy layer.
Application Techniques for Frontals vs. Closures
Precision is key when working with different lace sizes. For a 13x4 or 13x6 HD lace frontal, focus your precision on the ear-to-ear hairline. This is the most visible area of the melt. When working with 4x4 or 5x5 closures, concentrate the pigment along the pre-plucked part line to create depth. To avoid pigment bleed, keep the foam away from the hair roots. If foam touches the hair, wipe it immediately with a damp cloth. This keeps your install looking sharp, clean, and professional.
Setting the Tint for Long-Wear
Sealing the pigment separates a DIY job from a professional install. A blow dryer on a cool or low-heat setting acts as a fixative. It forces the pigment into the lace fibers, preventing it from running or rubbing off onto your forehead. Avoid washing the lace for at least 24 hours after tinting. This allows the pigment to fully bond with the material. Once dry, flip the wig back and check the front. The transition should be seamless, smooth, and perfectly matched to your skin.
Advanced Blending: Integrating Edge Control and Wax Sticks
You have mastered how to use lace tint mousse to match the lace to your skin, but the work doesn't stop there. Realism is found in the details. A perfect melt requires a seamless transition from the tinted mesh to your styled hair. Without securing baby hairs and flyaways, even the best tint can look like a wig. Styling products are the final layer of your scalp illusion. They bridge the gap between the artificial lace and your natural aesthetic.
The "Tie-Down" method is the secret weapon for a professional finish. After applying your tint and adhesive, wrap a silk or elastic melting band tightly around your hairline. Leave it for 10 to 15 minutes. This pressure forces the tinted lace into the skin, removing any remaining visible texture. It creates a vacuum-like seal that makes the lace appear as though it is melting directly into your forehead. This step ensures your hard work with the mousse truly pays off.
Perfecting the Hairline with Edge Control
Baby hairs are the ultimate camouflage. Apply a small amount of Shundietrend Edge Control to your hairline using a fine-tooth comb or edge brush. Swoop the hair gently over the edge of the lace. Because you have already used the mousse, the lace underneath these hairs now looks like your actual scalp. This creates a realistic base for your edges to sit on. This high-hold formula ensures the lace remains firmly pressed against the skin throughout the day, preventing lifting or shifting. It is about precision, smoothness, and total confidence.
Using Wax Sticks for a Flat Install
A bulky wig crown is a dead giveaway. The secret to a salon-finish is removing volume from the top of the wig. Apply a Shundietrend Hair Wax Stick directly to the part line and the hair near the roots. Use a hot comb to press the hair flat. This removes flyaways and makes the hair lay flush against your head. This technique works exceptionally well with straight human hair bundles, creating a sleek, high-end look that highlights your tinted part. When the hair is flat, the tinted lace is more visible, making the "scalp" look even more convincing. Details define the look. Precision creates the melt.
Ready to achieve the ultimate scalp-like finish? Elevate your styling routine and shop Shundietrend styling essentials today for a professional-grade melt.
Longevity and Care for Your Tinted Lace Install
A professional scalp melt is an investment in your daily confidence. When you understand how to use lace tint mousse correctly, you can expect your realistic finish to last between one and two weeks. While the pigment is designed for longevity, natural skin oils and environmental factors will eventually cause the tint to soften. Maintaining that high-end look requires a consistent care routine that protects both the lace material and the hair fibers. Precision in your maintenance is just as important as the initial application.
The foundation of your style dictates how well the install holds up over time. Premium raw human hair bundles hold their shape and luster significantly longer than lower-grade alternatives. High-quality, cuticle-aligned hair puts less strain on the lace during daily styling. This ensures your tinted scalp illusion remains undisturbed and vibrant. When you invest in professional-grade hair, the entire install feels more secure and looks more natural for the duration of the wear.
Nighttime Protection for Your Melt
Friction is the enemy of a flawless install. A satin bonnet is a non-negotiable accessory for preserving your tinted lace. It creates a smooth barrier that prevents your pillowcase from rubbing against the hairline, which can lift the lace and dull the pigment. In the morning, use a light mist of Silk Mist Spray to revive the hair's natural luster. Avoid applying heavy oils or grease near the lace area. These substances can break down the adhesive and cause the mousse pigment to slide or fade prematurely. Keep the lace clean and dry to ensure the melt stays sharp.
When to Re-Tint Your Lace
You will know it is time for a refresh when that ashy, greyish cast begins to peek through at the part line. This usually happens as your skin's natural oils interact with the foam. You don't need to remove the entire wig to fix this. The "Touch-Up" technique is fast and efficient. Dip a Q-tip into a small pump of mousse and gently dab it along the exposed part line or the very edge of the hairline. This targeted approach allows you to maintain the melt without a full re-install. Mastering how to use lace tint mousse for these quick fixes keeps your aesthetic polished and precise.
- Daily Check: Inspect the hairline for any lifting or fading pigment.
- Edge Maintenance: Use Shundietrend Edge Control to keep baby hairs swooped and the lace edge hidden.
- Nightly Routine: Always secure your hair in a satin bonnet to prevent pigment loss.
- Product Care: Avoid saturating the lace with water unless you are performing a full wash.
Step Into Your Most Realistic Install Yet
Achieving a flawless melt is no longer a salon-only secret. By following the right prep steps and mastering the layering technique, you can create an undetectable transition that lasts for weeks. You've learned the importance of matching skin undertones, the precision of mousse over messy sprays, and the necessity of consistent nighttime protection. These small, deliberate details transform a standard wig into a masterpiece of realism that moves with you.
Mastering how to use lace tint mousse gives you total control over your aesthetic. Our professional-grade formula features buildable pigment designed specifically for HD and transparent lace. It's the trusted choice for stylists who prioritize the longevity of raw hair installs. You deserve a look that is smooth, precise, and completely seamless every single day. High-quality hair deserves a high-quality finish.
Shop Shundietrend Lace Tint Mousse for the Perfect Melt today and elevate your daily style routine. Your journey to a perfect, scalp-like finish starts with the right tools. Embrace your natural beauty with confidence and enjoy a melt that stays pristine and reliable.
Frequently Asked Questions
Can I use lace tint mousse on transparent lace?
Yes, you can use it on transparent lace. It is the perfect tool for transforming clear mesh into a realistic skin match. Because transparent lace has no initial pigment, the buildable nature of the mousse allows for total customization. Apply thin layers and dry each one to ensure the color remains even and precise. This creates a seamless, scalp-like appearance for any complexion.
Is lace tint mousse waterproof or will it run if I sweat?
Lace tint mousse is highly water-resistant once it is properly set with heat. It won't run or smudge from light moisture or daily perspiration. To ensure maximum longevity, always use a blow dryer on a cool setting to lock the pigment into the lace fibers. This creates a smudge-proof finish that stays vibrant and secure until your next full wash.
Do I apply lace tint mousse to the inside or outside of the wig?
Always apply the mousse to the inside of the wig. By tinting the underside of the lace, you ensure the pigment sits directly against your skin for a perfect blend. This method also protects the hair bundles from staining or discoloration. Flip the wig inside out, apply the foam, and use a small brush to spread it evenly across the mesh surface.
What is the difference between lace tint mousse and lace tint spray?
The primary difference is the level of control and precision. Mousse features an aerated foam texture that stays exactly where you put it, unlike liquid sprays that can drip or overspray. It dries much faster and is easier to blend for a natural look. This makes it the superior choice when learning how to use lace tint mousse for a clean, salon-quality install.
Can I use lace tint mousse on synthetic wigs?
This product is designed specifically for the high-quality mesh found on human hair wigs. Synthetic lace is often non-porous and won't absorb the pigment effectively, leading to a splotchy or unnatural finish. For the best results, use the mousse on HD or transparent lace paired with premium raw hair. This ensures a smooth, professional integration that looks like a real scalp.
How do I remove lace tint mousse if I make the lace too dark?
You can remove or lighten the tint by washing the lace with warm water and a gentle clarifying shampoo. For stubborn pigment, a soft cloth with a small amount of rubbing alcohol can help lift the color. To avoid this, always start with a single pump and check the shade against your skin. It is much easier to add more color than to remove it.
Should I apply the mousse before or after I glue the wig down?
You must apply and dry the mousse before you glue the wig down. Tinting the lace while it is still off your head allows for even distribution and proper heat setting. If you try to tint after gluing, the moisture can interfere with the adhesive's bond. Proper sequencing ensures a secure, long-lasting melt that remains flawless and undetectable throughout the day.
Does lace tint mousse work for all skin tones?
Yes, the buildable pigment is designed to accommodate a wide range of complexions. By selecting a shade like Light, Medium, or Dark Brown, you can customize the depth of the tint to match your specific undertones. Understanding how to use lace tint mousse allows you to create a personalized scalp match that looks natural and professional for every unique skin tone.